Questions? Text (424) 652-8787 — replies within hours

SignifyLA — Custom Signs

How to Design Your Custom Sign

A step-by-step guide to personalizing your sign — no design experience needed.

Create Your Free Account

To save your designs and reorder them later, you’ll need a free SignifyLA account. Without an account, you can still design and purchase — but your work won’t be saved.

Already have an account? Just sign in and you’re ready to go. New here? Click Register, enter your email, and you’ll receive a link to set your password.

Learn the Design Editor in 3 Minutes

Prefer to watch? Our step-by-step video walks you through the entire design process — no experience needed.

5 easy steps

01

Choose Your Options

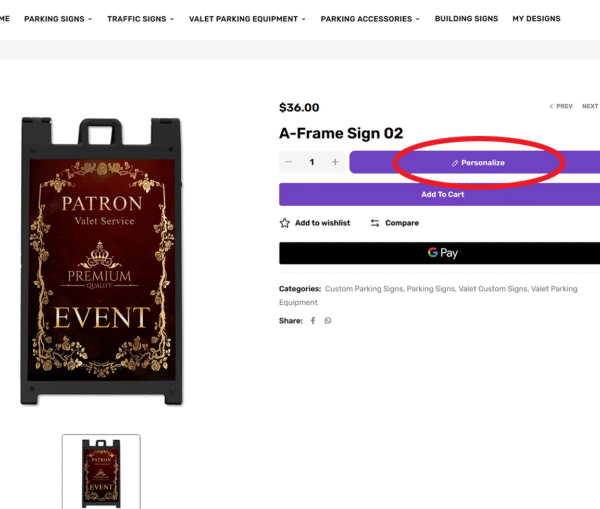
On the product page, select your sign options — single or double side, frame color, and laminate finish. The price updates automatically based on your selections. Then click the red Personalize button.

02

Meet the Editor

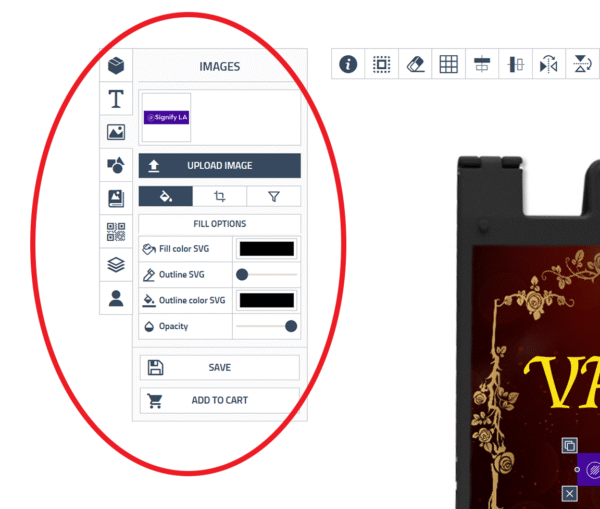
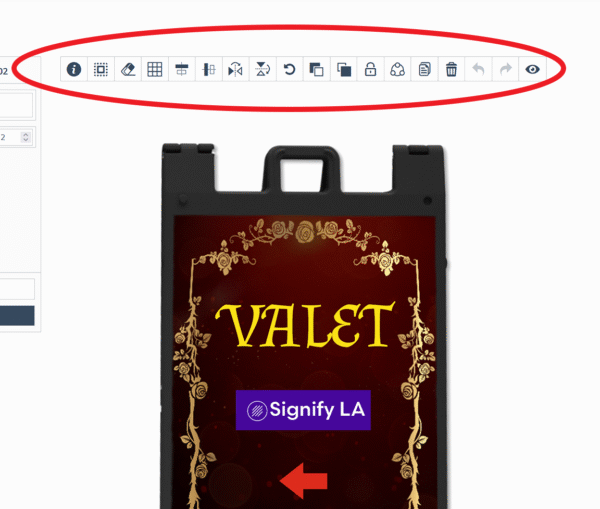
The design editor opens with three main areas:

  • Left panel — Tools for Text, Images, Shapes, Clipart, Layers, and My Designs
  • Top toolbar — Select, erase, center, flip, rotate, duplicate, lock, preview, undo/redo
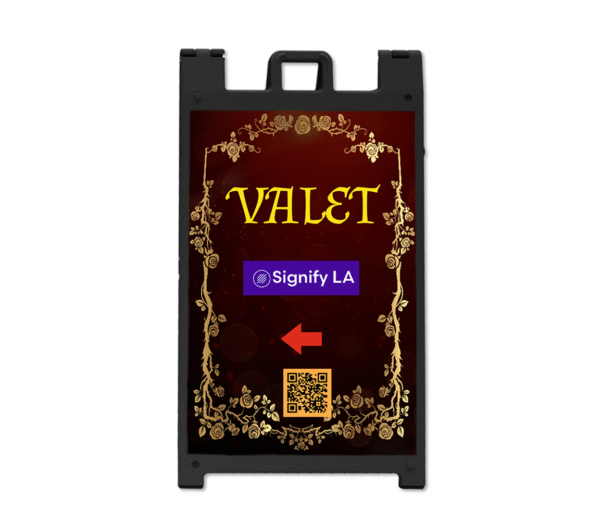
  • Center canvas — Live preview of exactly how your sign will look when printed

03

Edit Your Text

Click on any text area to activate it. Only highlighted areas are editable — this keeps your sign looking professional. Once selected, you can change the text, font, size, color, and apply effects like curved or arc styles.

04

Upload Your Logo

Click the image icon and upload your file.

⚠️ Important: Your logo must be at least 300 DPI or 1000px wide. Low-resolution images will appear blurry when printed and cannot be corrected after production. If you’re unsure, contact us before ordering.

05

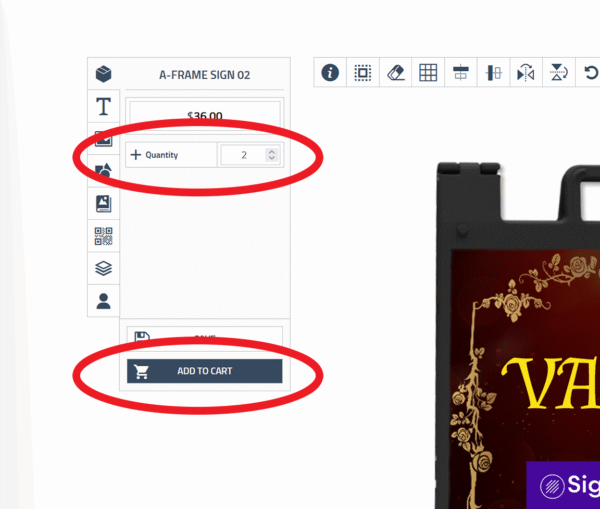
Save and Add to Cart

Click SAVE to store your design in My Designs. Then click Add to Cart to place your order.

⚠️ Need to change your options? Remove the item from your cart, re-add it with the new selections, and personalize again.
Important Notes